Good Morning Challengers
We have flown through another week and it's the last day of May and your last chance to enter our DT call here
We have flown through another week and it's the last day of May and your last chance to enter our DT call here
DT CALL NOW CLOSED THANKS EVERYONE!

Winners will be announced Tuesday!
Now onto this weeks Challenge
'Wrap it up with Ribbon'
'Wrap it up with Ribbon'
We would love to see your cards/ projects using ribbon
Eiglas has a brilliant Tutorial for you so I'll hand you over to her now,
be warned it's brilliant and you are going to just want to try this one...
be warned it's brilliant and you are going to just want to try this one...
It's my turn to provide a tutorial for you all this week at Top Tip Tuesday and it's one of my favourites - a Maze Book.

This Maze Book, is a miniature book using a single sheet of 12" 12" paperstock and a few scraps.
I first learned this project from an American site - TV Weekly (not sure if it's still up and running or not - must look!) a few years ago and I was so chuffed with it at my first attempt, I've made a few of them now. They're great as a little memento of a night out or a new baby or...well, just about anything really!

All it takes is a little bit of folding, three simple cuts, some good gluing techniques and the basic book is ready for photos and embellishments. This little book makes a great gift or a pocket-sized scrapbook to show off those holiday photos, babies, pets or a great night out!
Please read the whole project before beginning to craft as there are a couple of alternative ways of using this book and it’s best to know which one you want to make before starting!
For the first one you are best using a double-sided 12 x 12 as you will see both sides of the paper.
For the second one you could also use double sided or you could cheat like me with single-sided and put a few little liners in!
Materials
Patterned 12 x 12 heavy-ish scrap-sheet A to taste x 1 (ds if preferred)
Plain grey-board or similar 4” x 4” x 2 Patterned paper B 4.5” x 4.5” x 2
Quantity of patterned paper B for cheat’s way.
Bone Folder
PVA Adhesive
Foam Brush
Cutting Mat
Craft Knife
Ruler
Ribbon x 1 yard
Embellishments and photos to suit
Narrow ds tape
Method
Fold the two edges back to the outside of the fold, making the page into long quarters.
Fold this again into quarters the other way. Reinforce the folds with the bone folder.
You should have a 3” square of folded paper.
Open your paper out. Your paper should look like this

Open the scrap-sheet. Your 12 x 12 should have sixteen squares marked by creases.

Cutting the “maze”.
Unfold the cardstock on top of a cutting mat. Lay a ruler along the right vertical crease. Using a craft knife, cut along the right vertical fold using the ruler as a guide. Start at the top horizontal fold and cut all the way to the bottom edge.

Make a second identical cut along the left vertical fold. Make a third cut along the middle fold, but this time start cutting from the top edge and stop cutting when you reach the bottom horizontal fold. The cuts in the cardstock form an “M”.

Now fold the cardstock into the book pages.
Start folding from one end along the creases. When you reach the top of each section, fold the stack over to the next, following the natural fold.
Continue to fold into a square following the creases you made . 
Set the pages aside.
The End-Boards
Take one of your grey-board squares (..mine are actually small pieces of cream illustration board..) and one of your patterned paper B squares.
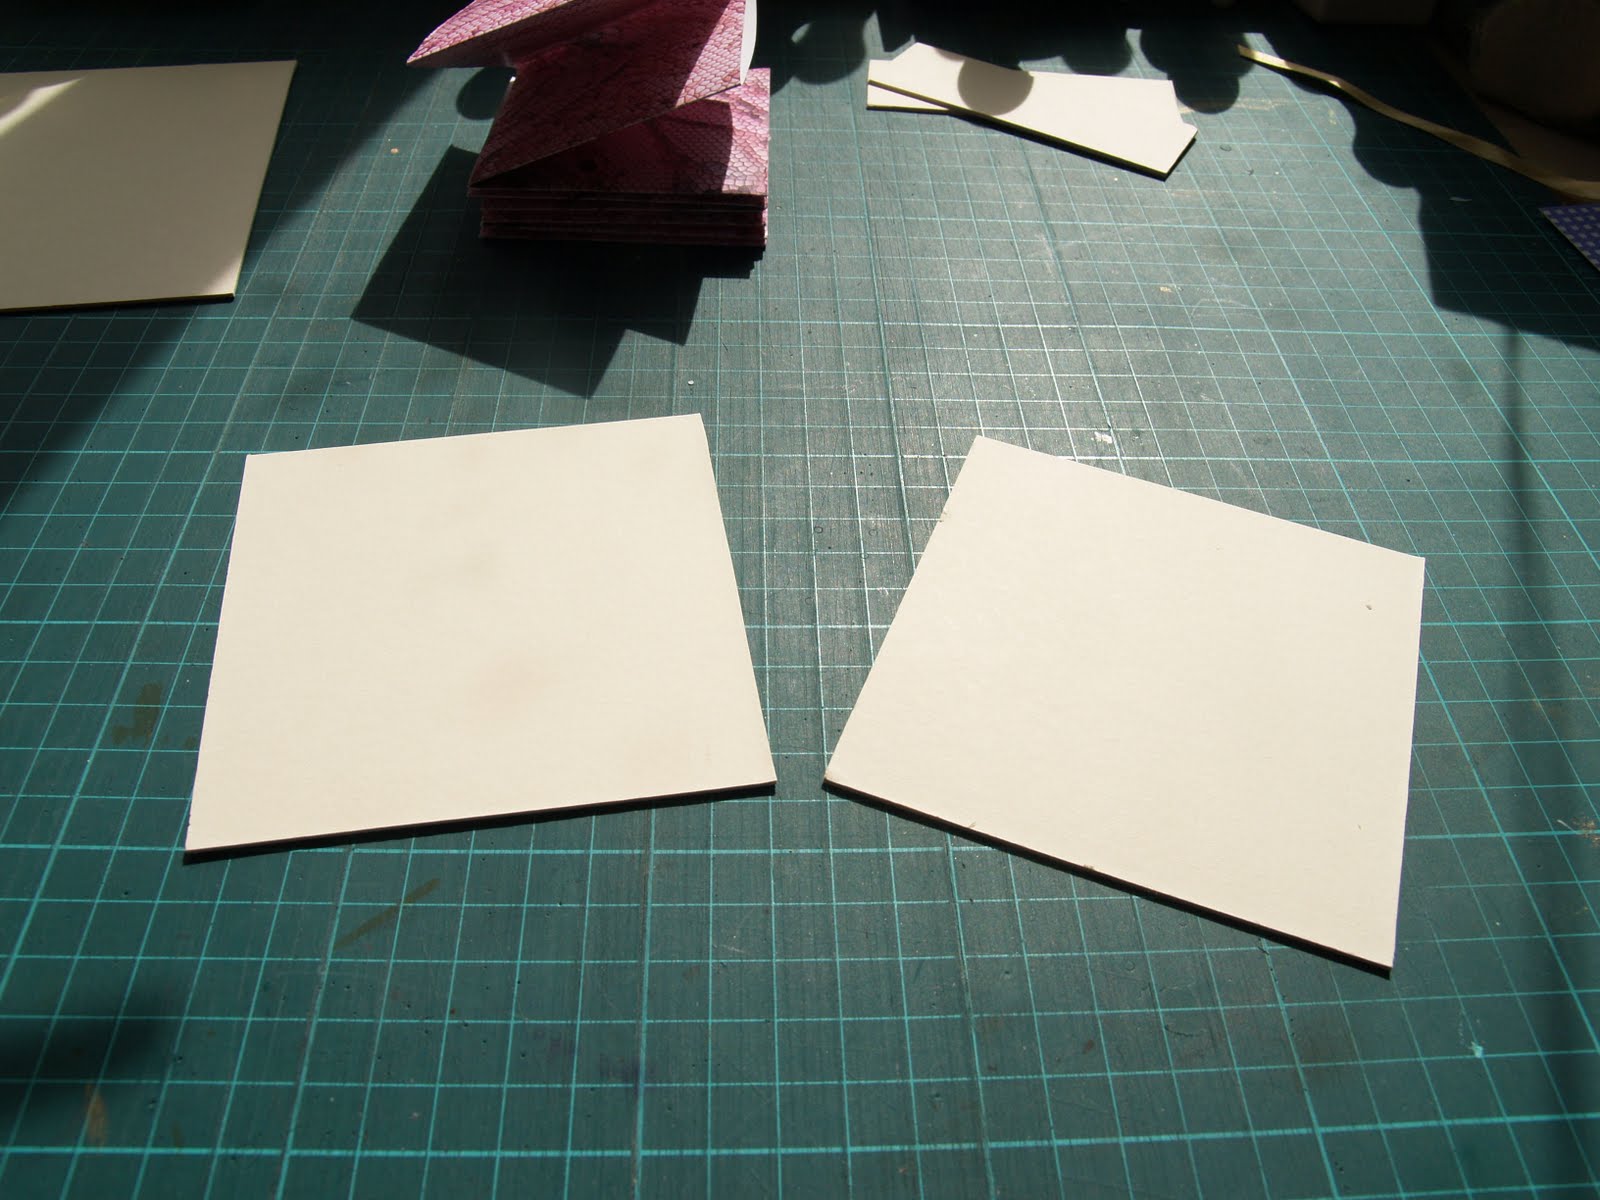

(I'd use an old magazine or layout pad to do the pasting on so you can just tear and throw away the page - less messy!)
Place the board on the paper and score around it. This 'teaches' the paper which way you want it to bend when you've glued it.
Before you glue, cut off a tiny bit of the point of each corner of the board. Makes a tidier corner when covered.
Make a 'squiggle' of PVA on the board and using your foam brush, spread it from the centre outwards, then offer the board to the centre of the paper.
Before you glue the flaps, take your scissors or knife and cut off the corners of the paper approx 16th of an inch away from the board (not like I did - I cut them off after gluing because I forgot! LOL!)

There should be enough PVA on your foam to run it round the exposed paper but if not, add just a LITTLE more and wipe it around the edges pushing it gently into the edge of the board. Now fold the flaps over and smooth them down using the point of your bone-folder to tuck the corners in (like when gift-wrapping). Repeat on second board and put aside to dry.
Variation One - Pockets
Take up your pages again and if you want to make fewer pages but have pockets in them now's the time to do it as it's harder to 'play' with the pages once they're stuck together and the ends are on. I used my scalloped punches to make little openings and because my paper is single-sided I had to make little 'liners' from the contrasting paper to pop behind the apertures. This is where you may prefer to use a double-sided paper so you don't need to do that.

Once you're happy with this, take your ds tape and create your pockets. One or two are sideways ones, so don't think you've done it wrong when you come across them!
Variation Two - Long Maze
This one is easy! Your maze is made! Just decorate and embellish to taste.
Adhere the end-boards
Place your two boards patterned side down and evenly placed on your magazine again.
Squiggle your pva and spread again.
Place your ribbon across the two end-boards then place your pages in the centre of one board over the ribbon.

Place the other end-board on top and manipulate your ribbon to suit.
Fill your pockets with tags, photos tickets etc.

Your Maze-Book is finished!

(my photo corners are all silvertone - don't know why they look gilt in the photo!)
I hope you enjoy making this book - I love them and once you get the hang of them, they take only minutes to make!
Hugs
Ei
x
~~~~~~~~~~~~~~~~~~~~~~~~~~~~~~~~~~~
Wow Ei Great tutorial!
Now on to this weeks fabulous Sponsors.

and a lovely prize of 4 digi images of winners choice.
A little bit about Pink Gem Designs
Pink Gem Designs is based in Stourport-on-Severn, Worcester in the UK and began trading in November 2008 to design and sell cute and whimsical craft stamps manufactured in clear polymer. All the stamps have been manufactured from original images drawn by Janet Roberts who is the Sole Proprietor of Pink Gem Designs. In the last year we have added to our products by selling Digi stamps and other crafting materials
Pink Gem Designs is based in Stourport-on-Severn, Worcester in the UK and began trading in November 2008 to design and sell cute and whimsical craft stamps manufactured in clear polymer. All the stamps have been manufactured from original images drawn by Janet Roberts who is the Sole Proprietor of Pink Gem Designs. In the last year we have added to our products by selling Digi stamps and other crafting materials
************

and a brilliant prize of...


A little bit about Digital Delights
Welcome to Digital Delights, a magical place filled with digital stamps from all walks of life. We have a wide range of digital stamps which are delivered straight to your email 24/7!! Don't forget about our custom blog design and custom watermarks, all of which are fantastically priced.
Welcome to Digital Delights, a magical place filled with digital stamps from all walks of life. We have a wide range of digital stamps which are delivered straight to your email 24/7!! Don't forget about our custom blog design and custom watermarks, all of which are fantastically priced.

And more samples from the TTT Design Team using fab images from Digital Delights...


Please visit the DT's blog's for more info on their projects
and leave them a comment, DT Members love comments too...
...and really appreciate them :)
***********************************************
Don't forget to follow our rules
~ Link to post and not just your blog ~
~ No backlinking ~
(projects posted before 31st May will not win prizes)
~ Max 3 entries each ~
~ Add 'TIP' after your name to indicate you also have a tip in your post ~
***********************************************
Challenge closes at 5pm UK time Monday 6th June 2011
Now its over to you!


