WOW what a fantastic week!
And we have lots to share today so be sure to read everything!!
Firstly please let me on behalf of the Top Tip Tuesday Team thank everyone who entered or helped promote our DT call!
We are super excited as we have some brilliant news!
!!! ** Drum Roll please** !!!
Please Join me in welcoming our new Designers!
WELCOME ABOARD GIRLS
We have not thrown them in the deep end so you will be able to see their first projects on the 14th of June for their first Challenge,
Shuush! wanna know a secret too!
we are going to have a fun new Tipper week too!
What's Tipper week I hear you cry?
MARK your Diary and don't miss the 14th June and you will find out then!
tehehheee!
Oh and be sure to check the winners post Today!
The DT CALL's lucky winner is on there too!
Grin
************************
Ready to play?
This weeks Tutorial Host is
Heike
Hi everyone, here comes my Tutorial.
Hope you like it and my English is okay.This weeks Tutorial Host is
Heike
Over to her for an awesome and super cute Tutorial
Hi everyone, here comes my Tutorial.
I made the WS in 2 languages.
Teabag Booklet

Was ihr alles dafür braucht:
1 Cardstock oder Scrapbookpapier 30 x 15 cm
1 Cardstock 10,1 cm x 8,2 cm
Scorpal
Klebeband
Spellbinders Stanzen
Ribbon
Embellishments
Supplies:
One 12" x 5,90" pieces of Scrapbookpaper or Cardstock
One 3,97" x 3,22" piece of cardstock
Scor-Pal™, or other scoring tool
Sticky Strip™ tape or other strong adhesive
Big Shot™, or other die cut machine
Embellishments
Ribbon
Step-by-Step

Schritt 1
Step 1
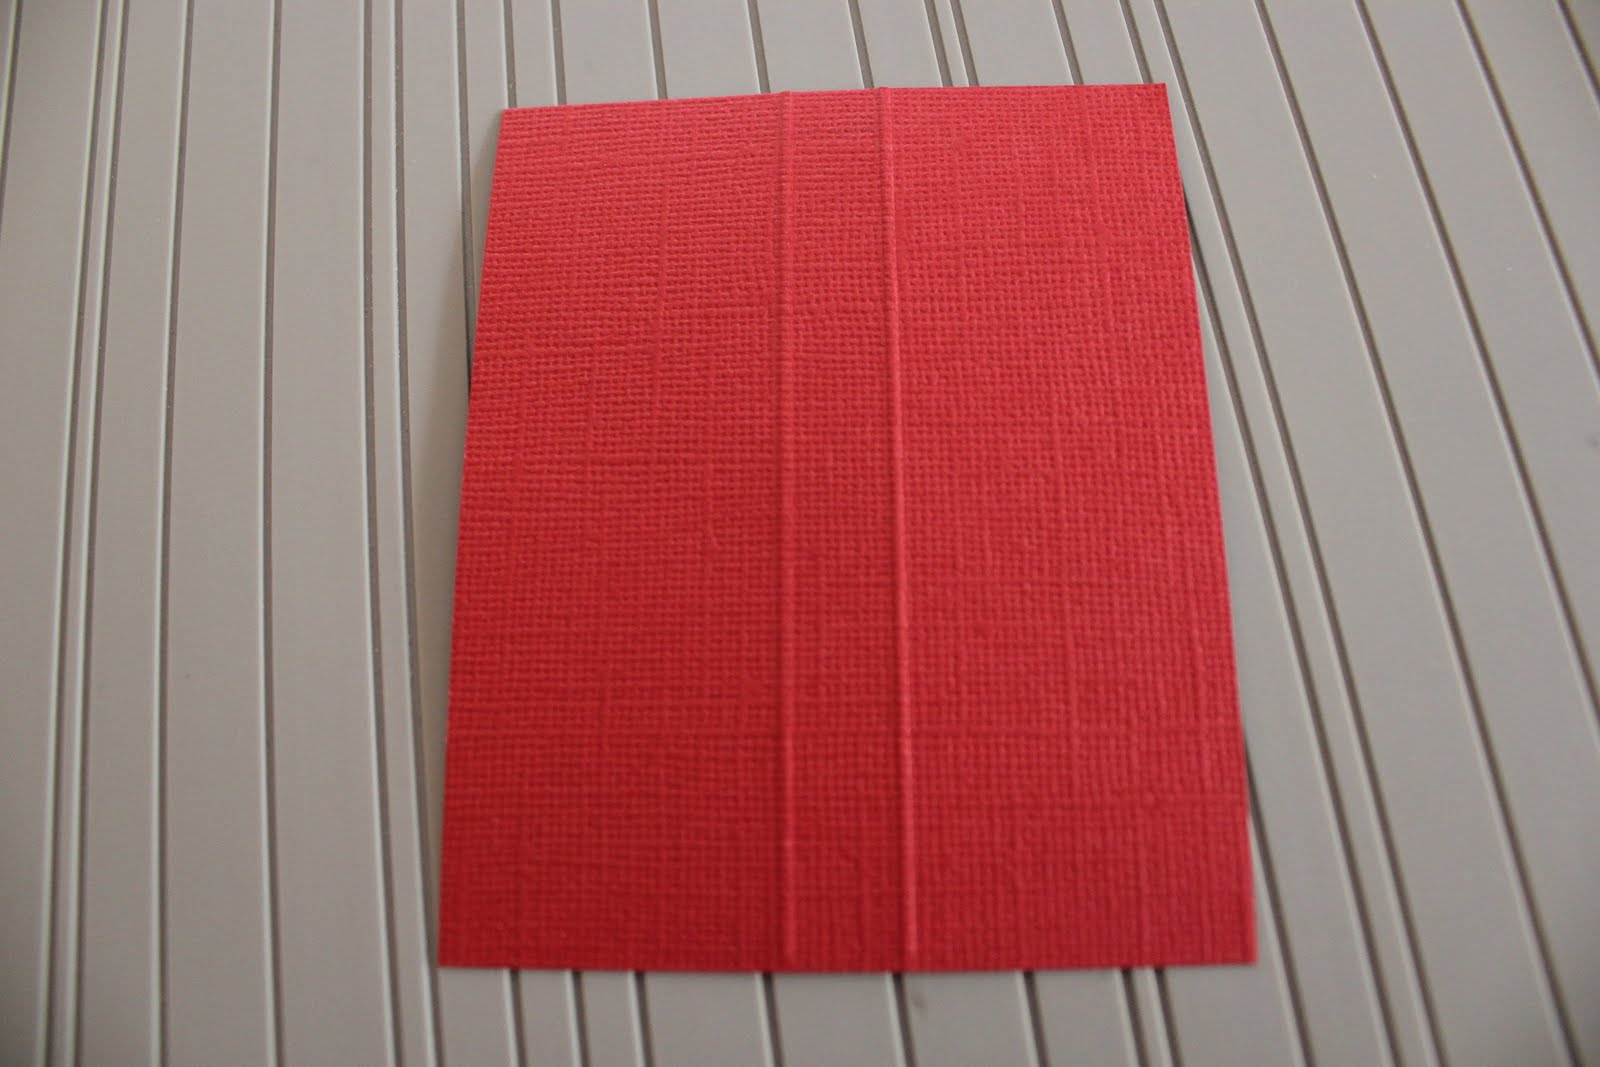
Für das Innenteil nehme ein Srapbookpapier 30 x 15 cm und falze es bei 7,5 cm im Wechsel.
For the inside from the booklet, score your 12" x 5,90" piece of scrapbook paper or cardstock on its long side at 3",6",9”.

Schritt 2
Step 2
Dann dreht ihr das Cardstock um und falzt auf der kurzen Seite bei 5 cm.
Turn cardstock piece and score the short side at 2".

Schritt 3
Step 3
Dann falzt ihr die Linien mit einem Falzbein gut nach.
Fold the score lines with a scor tool.

Schritt 4
Step 4
Das Innenteil wird jetzt bei der 5 cm Falzung an den Seiten festgeklebt, dass sind dann die Innentaschen für die Teebeutel.
Then you apply Sticky Strip to the right and left side of the 2"score fold, as shown.

Schritt 5
Step 5
Nun sollte euer Buch so aussehen.
Your book look now, as shown.


Schritt 6
Step 6
Jetzt kommt das kleinere Papier für den Einband zum Einsatz. Ihr falzt es bei 3,5 und 4,6 cm. Der Einband wird jetzt an das Innenteil geklebt.
Now score the little paper for the book cover at 1,37 and 1,8. Add the book cover with Sticky Strip and place it on the inside that you fold before.


Schritt 7
Step 7
Ich habe das Ribbon erst danach befestigt, ihr könnt es aber auch unter den Einband plazieren.
I place the ribbon after the sticking with the book cover. You can place this before or after, suit yourself.

Schritt 8
Step 8
Jetzt müsst ihr das Büchlein nur noch nach eurem Geschmack verzieren und die Teebeutel nicht vergessen!
Now your booklet is almost finish, create the inside and cover how you like.
Hier ist meine fertige Variante, viel Spaß beim nachbasteln!!
Here are my finish Teabag Booklet, i wish a happy crafting!!


Challenge ' MORE THAN 1 FOLD'
and we have AWESOME sponsors
The Crafty Pad
fabulous prize of - 2 Digi Images

Debbie at The Crafty Pad Stamp Designs said:
The Crafty Pad Stamp Designs is proud to sponsor Top Tip Tuesday.
I own and run The Crafty Pad Stamp Designs.
We offer a variety of both polymer stamps and digi stamps. Weekly challenges are held at The Crafty Pad Blog.
and we also have the lovely Fred She Said
fabulous prize of - 2 Digi Images
Debbie at The Crafty Pad Stamp Designs said:
The Crafty Pad Stamp Designs is proud to sponsor Top Tip Tuesday.
I own and run The Crafty Pad Stamp Designs.
We offer a variety of both polymer stamps and digi stamps. Weekly challenges are held at The Crafty Pad Blog.
and we also have the lovely Fred She Said

Tracey from Fred She Said said:
Fred She Said Designs offers a wide variety of digital products with a floral flair and cute characters too - Digi's, Pre-coloured images, Papers, Sets, and Fred's Flower Kits. Have some fun with Fred!
We also have a special Guest Designer too!
Norma

Well as always I am so happy to share our Designers projects,
and some of them have done Heike's Tutorial too!
Ei


Maggie


Now its over to you!

We also have a special Guest Designer too!
Norma

Well as always I am so happy to share our Designers projects,
and some of them have done Heike's Tutorial too!
Ei


Maggie


Please visit the DT's blog's for more info on their projects
and leave them a comment, DT Members love comments too...
...and really appreciate them :)
***********************************************
Don't forget to follow our rules;
~ Link to post and not just your blog ~
~ No backlinking ~
(projects posted before 7th June will not win prizes)
~ Max 3 entries each ~
~ Add 'TIP' after your name to indicate you also have a tip in your blog post ~
***********************************************
Challenge closes at 5pm UK time Monday the 13th of June 2011
Now its over to you!


