Showing posts with label cheesecake. Show all posts

Roasted Strawberries-and-Cream Cheesecake


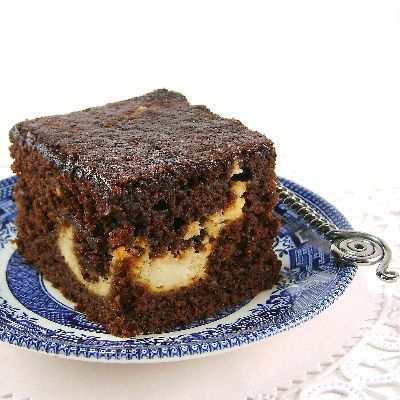
From the kitchen of One Perfect Bite...Left to my own devices this cake never would have happened, but the Silver Fox made a request that I couldn't refuse. He loves cheesecake and was taken with the notion of one made with roasted strawberries. He had seen the cake on Martha Stewart's site and ask me to try it. He rarely makes such specific requests and I felt duty bound to give it a try. I must also admit to some curiosity about the combination of roasted strawberries with cream cheese, and that, coupled with this picture from her site, completely hooked me. So? Let me begin by saying this is a nice cake, and those of you who enjoy cheesecake should consider giving it a try. The deeper flavor of the roasted strawberries certainly makes the cake interesting and worth a one-shot, if nothing more. The cake is not without problems. Fortunately, they can be overcome with a little patience and some common sense. My cake needed a full 70 minutes of baking to barely set and, by that time, the surface of the lovely creamy layer had turned a decidedly beige hue. I was still not convinced it was done enough to hold together when released from the pan, so I let in stay in the oven, heat off, until it cooled. Fortunately that, plus a full 24 hours in the refrigerator, did the trick. Strawberries-and-beige lacks the panache of strawberries-and-cream, so I put a glaze on the top of my finished cake to hide a less than stellar color. If I make this again, I'll opt for a sour cream topping rather than the glaze, which I think, in retrospect, provides too much contrast with the muddy pink of the strawberry layer . While the cake gains flavor the longer it sits, I would also add some strawberry extract to boost its taste next time around. That of course begs the question. Would I make the cake again? Probably not. I'm glad I tried it, but there are lots of cheesecakes out there that I prefer. Here's the recipe for those of you I haven't scared away.

Roasted Strawberries-and-Cream Cheesecake...from the kitchen of One Perfect Bite, courtesy of Martha Stewart Living Omnimedia

Ingredients:

1 pound strawberries, hulled
3 tablespoons light corn syrup
1 cup finely ground graham crackers (about 4 sheets)
1 cup plus 3 tablespoons sugar
3 tablespoons unsalted butter, melted
1 pound plus 13 ounces cream cheese, room temperature
1/4 teaspoon salt
2 large eggs, room temperature
1 vanilla bean, seeds scraped and reserved
8 ounces mascarpone cheese, room temperature

Directions:

1) Preheat oven to 300 degrees. Place strawberries in a single layer on a rimmed baking sheet. Drizzle with corn syrup, and toss gently to coat. Bake until syrup thickens and strawberries turn deep red and shrink slightly, about 1 hour 30 minutes. Transfer strawberries and syrup to a medium bowl, and mash with a potato masher. Let cool completely.
2) Raise oven temperature to 350 degrees. Stir together graham cracker crumbs, 3 tablespoons sugar, and the melted butter in a small bowl. Press mixture into the bottom of a 9-inch springform pan to make an even layer. Bake until crust is firm to the touch and has just darkened, about 10 minutes. Transfer pan to a wire rack, and let crust cool completely.
3) Reduce oven temperature to 325 degrees. Put cream cheese into the bowl of an electric mixer fitted with the paddle attachment; mix on medium-low speed until creamy, about 2 minutes. Scrape down sides of bowl, then gradually add remaining cup sugar and the salt. Scrape down sides of bowl; add eggs, 1 at a time, mixing well after each addition. Scrape down sides of bowl, and mix in vanilla bean seeds and mascarpone until very creamy and no lumps remain, about 3 minutes. (Reserve vanilla bean for another use.)
4) Transfer 5 cups cream cheese mixture to bowl with mashed strawberries; stir to combine. Pour strawberry-cream cheese mixture on top of crust; smooth with an offset spatula. Carefully spoon dollops of plain cream cheese mixture on top, smoothing with an offset spatula.
5) Wrap the exterior of the springform pan in 2 layers of foil; set in a large roasting pan. Fill roasting pan with boiling water until water reaches halfway up the sides of the springform pan. Bake cheesecake until set, about 1 hour to 1 hour 10 minutes. Remove springform pan from water bath, and transfer to a wire rack to cool. Refrigerate until cold, at least 4 hours (up to overnight). Yield: 8 to 10 servings.


One Year Ago Today: Strawberry Tea Bread


Two Years Ago Today: Circassian Chicken - Cerkez Tavugu


You might also enjoy these recipes:
Lemonade Cheesecake - Pennies on a Platter
Orange Ricotta Cheesecake - Ciao Chow Linda
Nigella's Chocolate Cheesecake - Bless Us O Lord
Apricot Cheesecake Bars - Culinary in the Country
Chocolate Chip Ricotta Cheesescake - Amanda's Cookin'
Strawberry Chocolate Cheesecake - Andrea Meyers
Key Lime Cheesecake - The Culinary Chronicles
White Chocolate Cheesecake - Kitchen Unplugged
Mascarpone Cheesecake and Hiking Fun - Baking Powders
Blackberry Cheesecake - Avocado Pesto


This post is being linked to:
Pink Saturday, sponsored by Beverly at How Sweet the Sound.

Chocolate-Ricotta Icebox Cake


From the kitchen of One Perfect Bite...It would be unfair to call the recipe a complete dud, but, boy, oh, boy, it sure comes close. The recipe was originally developed for Martha Stewart's website and I really expected more from it than was delivered. I wanted to try a few new desserts this week and the Silver Fox's birthday gave me the perfect excuse to experiment. We all know you get what you pay for. This cake, chosen for its ease of preparation, is the cook's corollary of that old adage. The cake, while relatively expensive to make, was easy to assemble and took about 15 minutes to prepare. There were hints of problems along the way. Warning flags should have been raised when the recipe directed folding whipped cream into a mixture that had the consistency of semi-set concrete. I blithely soldiered on, convinced that somehow it would all come together and a miracle would occur. It didn't. Six hours later, I had a dry, grainy cheesecake with close to no flavor, despite the copious use of orange liqueur and chocolate. I have no one to blame for this fiasco other than myself. After weeks of suggesting you read the comments submitted by followers of recipe sites, I failed to follow my own advice. Everyone of the problems I encountered had been experienced by others who attempted the recipe. Had I taken the time to read them, I could have spared myself a lot of grief and some serious coin. While I did not care for this cake, there were folks who did, so I'm including it here with a caution. Sorry, Martha. The cake is dense, grainy and strangely flavorless, but if you want to try it, here's the recipe.

Chocolate-Ricotta Icebox Cake...from the kitchen of One Perfect Bite courtesy of Martha Stewart

Ingredients:

Nonstick cooking spray
14 ounces semisweet chocolate (do not use chips)
2 containers (15 ounces each) part-skim ricotta cheese, room temperature
3/4 cup heavy cream
1 package (9 ounces) chocolate wafers (about 44 cookies)

Directions:
1) Prepare pan: Remove sides from a 9-inch round springform pan. Place a sheet of waxed paper over bottom, leaving an overhang; lock sides onto bottom, firmly securing paper. Spray inside of pan with cooking spray; line sides with a strip of waxed paper 28 inches long and 4 inches wide.
2) Make chocolate-ricotta mixture: Break 12 ounces of chocolate into pieces. Place in a heatproof medium bowl set over, not in, a pan of simmering water. Cook, stirring occasionally, until chocolate has melted, 8 to 10 minutes.
3) In a food processor, blend ricotta until very smooth, about 1 minute, scraping down sides of bowl. Add warm chocolate; blend until smooth. In a large bowl, beat cream until stiff peaks form. With a rubber spatula, gently fold in chocolate-ricotta mixture.
4) Assemble cake: Arrange half of cookies in an overlapping pattern to cover bottom of pan. Spoon half of chocolate-ricotta mixture on top of cookies; smooth top. Cover with remaining cookies; top with remaining chocolate-ricotta mixture, and smooth top. Cover with plastic wrap; refrigerate at least 6 hours and up to 2 days.
5) Before serving, release sides of pan and remove waxed paper from sides. Using bottom piece of waxed paper, pull cake onto a platter; with a metal spatula, lift cake and remove waxed paper. Using a vegetable peeler, shave remaining 2 ounces chocolate over top of cake. With a knife dipped in hot water, cut cake into 10 slices (wipe off knife, and dip in hot water after each slice). Yield: 10 servings.


One Year Ago Today: Marinated Portobello Burgers with Caramelized Onions and Roasted Garlic Aioli


Two Years Ago Today: Strawberry Glace Tart


You might also enjoy these recipes:
Chocolate Chip Ricotta Cheesecake - Amanda's Cookin'
Lemon Ricotta and Mascarpone Cheesecake - Italian Food Forever
Italian Ricotta Cheesecake - Sticky, Gooey, Creamy Chewy
Lemon Ricotta Cheesecake - Lazaro Cooks
Lime and Ricotta Cheesecake - Chocolate Shavings
Eggnog Ricotta Cheesecake - Baking Bites
Gingerbread Ricotta Cheesecake - Nami-Nami
Light Ricotta Cheesecake - Antics of a Cycling Cook
Ricotta Cheesecakes - The Cluttered Pantry
Ricotta Cheese Tart - Delicious Dishings

Peanutty Ice-Box Cake


Featured on Amuse Bouche the blog for the magazine Where Women Cook
.


From the kitchen of One Perfect Bite...Albert Einstein is attributed with saying, "Insanity is doing the same thing over and over again and expecting different results." Sometimes. Maybe. Confused might be a better word for the robin who spends all day, every day, diving into the large bank of windows that front our home. This has gone on for days now, and while we've done everything we can think of to ward him off, he'll keep at it until nesting season is over or he is concussed and falls from the sky. This happens every year and I'm always amazed these confused souls make it through mating season with their small brains intact. I mention this only because I can no longer deny my own recidivist tendencies. The delivery of locally raised meat forced me to access the contents of my auxiliary freezer. A quick inventory revealed that it was packed to the rafters and there was no room for the meat. This, too, happens every year and it's a good thing that Albert isn't around 'cause we all know what he'd say. After some mild cursing, deep digging and inventory analysis, I made space for the meat. The only bizarre aspect of the episode was my freezer wasn't jam-packed with meat or vegetables or survival staples. It was packed to the rafters with bread, berries and nuts. If ever there is a shortage of freezer jam stop by. I have enough of it to feed a small country. At any rate, tucked among the nuts was an embarrassingly large stash of peanuts. So, as you probably have already guessed, I'll be exploring recipes for peanuts for the next few days, and think I'll call the exercise Nuts to You Week in honor of Albert Einstein.

While many would call this a refrigerator cheesecake, I think it's more like an old-fashioned Charlotte or an ice-box cake. While it contains cream cheese, its texture is mousse-like and completely different than that of a cheesecake. The recipe, which comes from The Peanut Institute, is one of the easiest I've ever come across and even beginning cooks will be able to make it successfully. The Silver Fox made the cake that I photographed for this post. I've made no changes to the original recipe, but I do have a couple of suggestions should you decide to make it. I freeze the cake and slice it while it is frozen. This mousse-like cake is very soft, and in a perfect world it would benefit from the infusion of a bit of gelatin. The use of gelatin would, however, move the cake from its super easy status, so freezing it is the way to go if you want clean slices. Once it's cut, it has enough substance to stand on its own without drooping. I let the frozen slices sit in the refrigerator for an hour or so before serving. If I'm in a real rush 30 minutes at room temperature will also do the trick. This obviously is not gourmet fare, but it's a really nice dessert that's suitable for guests as well as family. If you like peanut butter desserts, you'll love this one. Here's the recipe.

Peanutty Ice-Box Cake...from the kitchen of One Perfect Bite courtesy of The Peanut Institute

Ingredients:
3/4 cup chopped roasted peanuts
1 cup graham cracker crumbs
1/3 cup butter, melted
2/3 cup creamy peanut butter
4 packages (3 oz. each) cream cheese, softened
1 can (14 oz.) sweetened condensed milk
1/3 cup lemon juice
1 teaspoon vanilla
1 container (4 oz.) frozen whipped topping, thawed
1/2 to 3/4 cup chopped roasted peanuts for garnish

Directions:
1) Combine peanuts, graham cracker crumbs and melted butter. Press crumb mixture into 9-inch spring form pan. Chill crust for 20 minutes.
2) Using an electric mixer, cream softened cream cheese and peanut butter until fluffy. Gradually add condensed milk and mix well. Add lemon juice and vanilla and blend well. Fold in whipped topping.
3) Pour mixture into prepared crust. Garnish with chopped peanuts. Chill 2-3 hours or freeze. Makes 12 servings.

You might also enjoy these recipes:
No-Bake Cheesecake with Green Apple Syrup - Anncoo Journal
Chocolate Strawberry Refrigerator Cheesecake - Passionate About Baking
Irish Cream Cheesecake - Drick's Rambling Cafe
No-Bake Cheesecake - Closet Cooking
No Bake Mini Cheesecakes - Gigi Cakes
Mini No-Bake Cheesecake - Felice in the Kitchen
Lemon Myrtle No-Bake Cheesecake - The Three Cheeses
No-Bake Low-fat Yogurt Cheesecake - My Wok Life
No Bake Vanilla Cheesecake with Thin Mint Crust - Baking Bites
Mini Oreo Cheesecakes (No Bake) - Made with Love
No-Bake Cheesecake - Diner's Journal New York Times
No-Bake Creme de Menthe Cheesecake - Delicate Flavors
No-Bake Bailey's Cheesecake - Ping Mouse
Blueberry Cheesecake - Pinoy Food

Chocolate Cheesecake Squares


From the kitchen of One Perfect Bite...I'm going to begin the chocolate extravaganza with one of the easiest recipes I'll be featuring this week. It's not a flashy or rich dessert, but I decided to include it for those of you who will be baking for Valentines who are, or should be, dieting. This is by no means diet food, but the squares are definitely lighter than their full-fat cousins. The recipe was developed by Martha Stewart and it uses reduced fat dairy products and unsweetened cocoa powder to make these light, but rich tasting, squares that taste far more like cheesecake than brownies. While they won't set your world on fire, the brownies are a nice alternative for those of you who are counting fat grams and calories. I've played ever so slightly with the original recipe. The first few times I made these brownies, I used sour cream, but found its tang to be off-putting. I solved that problem by using a low fat creme fraiche in its place. In order to get a richer chocolate flavor I also upgraded the cocoa powder I was using. I switched to Guittard products because that was what was available to me. I'm not touting this brand, but I do want you to know that this is a recipe where it pays to use the best chocolate you can get your hands on. If your ingredients are at room temperature, you can have the brownies in the oven in about 15 minutes. I found mine took a few minutes longer to cook than the recipe had indicated, but they were out of the oven in 45 minutes. I let them cool at room temperature for about an hour and then let them chill for an hour longer before cutting them. I think you'll like these. They are certainly worth a try. Here's the recipe.

Chocolate Cheesecake Squares...from the kitchen of One Perfect Bite inspired by Martha Stewart

Ingredients:
Nonstick cooking spray
8 chocolate wafer cookies
1 brick (8-ounces) reduced-fat cream cheese
1 cup reduced fat creme fraiche
1/2 cup unsweetened cocoa powder
2 tablespoons corn starch
3/4 cup sugar
1/4 teaspoon almond extract
1 large whole egg plus 1 egg white
1/3 cup semisweet chocolate chips

Directions:
1) Preheat oven to 325 degrees. Coat an 8-inch square baking pan with cooking spray. Line with two crisscrossed pieces of parchment or wax paper, spraying between the sheets. Spray lined pan and set aside.
2) Process cookies in food processor until finely ground. Gently press crumbs into bottom of prepared pan (it is not necessary to rinse the processor bowl).
3) Blend cream cheese and creme fraiche until smooth, scraping down sides of the bowl as needed. Add cocoa, cornstarch, sugar, almond extract, egg and egg white and process until smooth. Pour into pan and sprinkle with chocolate chips.
4) Bake until just set, 35 to 40 minutes (mine took 45 minutes). Cool completely in pan. Refrigerate at least 1 hour. Invert onto tray, peel off paper and reinvert crust side down. Cut into 9 squares. Yield: 9 servings.

You might also enjoy these recipes:
Bon Appetit Brownies - Cookie Madness
Double Chocolate Walnut Brownies -- Elana's Pantry
Deep, Dark Chocolate Espresso Brownies - Confessions of a Kitchen Witch
The Healthy Brownie - Squirrel Bakes
Thomas Keller's Ad Hoc Brownies - Lawyer Loves Lunch
Hazelnut Brownies - Baking and Boys
The Best Cocoa Brownies - The Sophisticated Gourmet
Nutella Fudge Brownies - Life's a Feast
Nutella Crunchie Brownies - Chow and Chatter

Old-Fashioned Gingerbread with Cheesecake Pockets - Blue Monday


From the kitchen of One Perfect Bite...Our day began with an early rain so intense it sounded like hail bouncing off the metal roof. While it might not wake the dead, its tattoo brought the Silver Fox and I to the table at an early hour. We lit the fire and shared a pot of coffee as the house warmed to the new day. We lazed a bit and then readied for what we thought the day might bring. Our plans had no contingency for precipitation that would not stop. Oregon winter rains, while heavy, are rarely constant and cloud breaks make it possible for the swift of foot to get out for at least short periods of time. There were no cloud breaks today and the rains were heavy enough to maroon us on our hillside for the day. We read a bit and then both gravitated to the kitchen. Bob rolled up his sleeves and started on a soup he had been wanting to try, and I, by consensus, went to work on an old-fashioned gingerbread we have both come to treasure. Gingerbread regularly appeared on the tables of our childhood and, for both of us, it is a food that evokes memories of warmth and comfort and a world forever young. Strangely enough, the recipe I use these days has replaced the one that came from Bob's family kitchen. The interloper was developed by Lynne Rossetto Kasper for The Splendid Table and I must tell you that for a new-fashioned recipe it makes the best old-fashioned gingerbread I've ever tasted. It is moist and dark and barely sweet but brimming with old-world flavor. The depth of its flavor can be controlled by the type of molasses and brown sugar you use to make the cake. The cheese pockets in the gingerbread are something I don't normally include, but I used them today to add a bit of contrast for the photo. I honestly don't think they add much taste to the finished cake, but they don't harm it either. Gingerbread was loved by our European ancestors for what they believed were its medicinal values. They considered it to be a cure-all for a range of ailments and, in dried and crushed form, used it as baby food for colicky infants. Ginger is known to settle upset stomachs, so they may not have been too far off base. I serve it because we love its taste and knee-bending aroma. Only bread has more allure as it bakes. I like to serve this warm with lemon sauce or maple whipped cream. The cake is very easy to make and you can have it oven ready in about 15 minutes. I do hope you'll try this. Here's the recipe.

Old-Fashioned Gingerbread with Cheesecake Pockets...from the kitchen of One Perfect Bite, courtesy of Lynne Rosetto Kasper

Ingredients:
Cheese Filling Mixture
1 egg
4 ounces cream cheese
1/4 cup sugar
2 teaspoons lemon juice
1/2 teaspoon vanilla extract
Gingerbread
2 cups less 2 tablespoons unbleached all-purpose flour (measure by spooning into cup and leveling)
1 generous teaspoon baking soda
Generous 1/2 teaspoon salt
1 tablespoon ground ginger
3/4 teaspoon ground cinnamon
1/4 teaspoon ground cloves
1/8 teaspoon fresh ground black pepper
6 tablespoons unsalted butter, melted
3/4 cup dark molasses
3/4 cup very hot water (190 degrees)
1/3 cup packed dark brown sugar
1 large egg

Directions:
1) To make the cheese mixture: Beat cream cheese until light and smooth. Add egg, sugar, lemon juice and vanilla and beat until well-blended. Set aside.
2) Butter an 8-inch square pan. Fit bottom with parchment paper. Butter paper and flour pan. Set aside. Preheat oven to 350 degrees F.
3) Whisk flour, baking soda, salt and spices together in a medium bowl. Set aside.
4) In a large mixing bowl, beat together butter, molasses, hot water and brown sugar. When the mixture is almost frothy, beat in egg and gradually add flour mixture. Stir just until blended.
5) Pour half of batter into pan. Drop spoonfuls of filling over batter and pour remaining batter over top of filling. Bake 35 to 40 minutes, or until a tester inserted in center of cake comes out clean. Cool on a rack in pan for a moist cake. For a drier consistency, cool 10 minutes, then turn out of pan and set on rack to cool. Yield: 9 servings.

You might also enjoy these recipes:
Caramel Apple Gingerbread Upside Down Cake - Cafe Johnsonia
Gingerbread Cream Cheese Muffins - All Day I Dream About Food
Chocolate Gingerbread Cupcakes - Chocolate Moosey
Deep Dark Spicy Gingerbread with Coffee Glaze - Luna Cafe
Chocolate Gingerbread Bars - The Parsley Thief
Gingerbread Cheesecake - Coffee and Tea
Gramercy Tavern's Gingerbread - Smitten Kitchen

This post is being linked to:
Smiling Sally - Blue Monday

Cranberry Layered Cheesecake


From the kitchen of One Perfect Bite...I was seduced by its color and because I'm weak, this five layered cranberry confection ended up on my table. I normally don't make desserts that are this involved. As a matter of fact, I rarely make cheesecakes at all. I love them, mind you. I just can't convince myself that the protein packed into all that cream cheese offsets the fat and calories that keep the protein company. The first time I saw this cake was on the table of an accomplished cake decorator. It was gorgeous and its garnet glow snared me before reason could take hold. I made a homely version of the cake, one precious time consuming layer at a time, and thought that would be the end of it. I never dreamed Bob would like it. He did and now I'm dealing with a case of unintended consequences. I'll have to make the cake again. The cake begins with an almond flavored crust that is partially filled with a sweetened cheese custard and then topped with a cranberry filling. The garnet layer is then smothered with the rest of the custard before being topped with sweetened sour cream. The cake bakes a considerable while, and then is cooled and chilled for a considerable while, before a final layer of cranberries crown the cake and decorations of almond whipped cream are applied. It is a lovely tangy cake that provides irresistible color on the holiday table. The recipe was developed by Teri Rasey for Taste of Home magazine. Despite the work, I'm glad to recommend this cake to you. I've made a few changes to the original recipe. which you can find here. My version of the recipe appears below. I suggest that you add salt and almond extract to the crust and that you eliminate the ground almonds from the whipped cream. Let the cake chill for 24 hours before serving. This is a very nice recipe and, if you like cheesecake, it will be a great addition to your files. Here's how it's made.

Cranberry Layered Cheesecake...from the kitchen of One Perfect Bite courtesy of Teri Rasey and Taste of Home magazine

Ingredients:
Pastry Layer
1/2 cup dried cranberries
2 cups cake flour
1/2 cup ground almonds
1/4 cup confectioners' sugar
1/4 teaspoon salt
1/4 teaspoon almond extract
1/2 cup cold butter, cubed
Cranberry Layer
3/4 cup sugar
2 tablespoons cornstarch
1/4 cup cranberry juice
2 cups fresh or frozen cranberries
Cream Cheese Layer
4 packages (8 ounces each) cream cheese, softened
1-1/2 cups sugar
1 teaspoon vanilla extract
4 eggs, lightly beaten
Sour Cream Topping
2 cups (16 ounces) sour cream
1/4 cup sugar
2 teaspoons vanilla extract
Whipped Cream Topping
1 cup heavy whipping cream
1 tablespoon sugar
1/4 teaspoon almond extract

Directions:
1) In a food processor, finely chop dried cranberries. Add flour, almonds and confectioners' sugar, salt and almond extract; process until blended. Add butter; pulse just until crumbly.
2) Press onto the bottom and 1-1/2 in. up sides of a greased 10-in. springform pan. Place on a baking sheet. Bake at 350° for 10 minutes.
3) In a small saucepan, combine 3/4 cup sugar and cornstarch; stir in cranberry juice until smooth. Add berries. Cook and stir until thickened and bubbly. Set aside.
4) In a large bowl, beat cream cheese, vanilla and sugar until smooth. Add eggs; beat just until combined. Pour half of batter into crust. Carefully spoon 3/4 cup berry mixture over batter; top with remaining batter.
5) Bake for 45 minutes. Reduce heat to 250°. Bake 25-30 minutes longer or until center is almost set. Combine sour cream, sugar and vanilla; spread over top. Bake 20-30 minutes or until set. Cool on a wire rack for 10 minutes. Run a knife around edge of pan to loosen; cool 1 hour longer. Spread remaining berry mixture over the top. Refrigerate overnight.
6) Beat cream with sugar and almond extract until stiff peaks form. Pipe around top edge of cheesecake. Yield: 16 servings.

You might also enjoy these recipes:
Caramel Cheesecake - Wild Yeast
Mini Bourbon Pumpkin Cheesecakes - Dessarts
Caramel Apple Cheesecake Pie - The Sweet's Life
German Cheesecake - Anja's Food 4 Thought
Pumpkin Toffee Cheesecake - The Other Side of 50
Pumpkin Cheesecake - Simply Recipes

Lavender Cheesecake Bars


From the kitchen of One Perfect Bite...I wanted to get this recipe to you while culinary lavender is still available in markets. It was given to me a few weeks ago by a lavender grower of Viennese extraction. Her dessert is as lovely as she is, and it speaks to the wonderful richness of the country in which she spent her childhood. Like most pastry from the area, this is barely sweet and the use of lavender is so subtle that only a truly discerning palate could identify its presence without some help. I was not able to identify the flavor the first time I had these bars. Everyone who samples them can detect an unidentifiable, but pleasant, flavor lurking in the background. When told what it has we all share an "ah-ha" moment. The only trick to cooking with lavender is discretion. A very little of it goes a long way, and too much of it will make your food inedible. The lavender taste in this recipe comes from a mildly flavored sugar and from a scant teaspoon of fresh buds that are added to the streusel topping. This is a very simple recipe. There is, however, a trap waiting for those who read directions just before they plan to bake. You need lavender sugar, and, while it's child's play to make, it takes about a week for the lavender to imbue the sugar. I use a ratio of two tablespoons of lavender per cup of sugar and blend them in my food processor to make a mildly flavored sugar that I store for a week before using. Here, as in most of my recipes, I toast the almonds before baking with them. Toasted nuts give baked goods a real flavor boost and these bars have a wonderful almond flavor. If your not watching calories you'll love these rich bars. Here's the recipe.

Lavender Cheesecake Bars
...from the kitchen of One Perfect Bite, inspired by Oregon lavender growers

Ingredients:
Crust
2/3 cup light brown sugar, packed
1 cup chopped toasted almonds
2 cups all-purpose flour
1/3 cup unsalted butter, melted
1/8 teaspoon salt
Topping
2 (8-oz.) packages cream cheese, room temperature
1/2 cup lavender sugar
2 large eggs
2 tablespoons lemon juice
1/4 cup milk
2 teaspoons vanilla
1 teaspoon fresh lavender buds

Directions

1) To make the crust: Preheat oven to 350 degrees F. Combine brown sugar, almonds, flour, salt and melted butter in bowl of a food processor. Pulse until crumbly. Reserve one cup for streusel topping. Press remainder of mixture into bottom of a 9 x 13-inch pan. Bake for 12 to 15 minutes.
2) To make filling: Beat cream cheese with lavender sugar until smooth. Beat in eggs, lemon juice, milk and vanilla. Pour over prepared crust. Mix lavender buds with reserved streusel topping. Sprinkle topping over cream cheese filling. Bake for 25 minutes. Cool on wire rack until pan is room temperature. Cut into 24 bars. Refrigerate. Yield: 2 dozen 1-1/2 x 3-inch bars.

You might also enjoy these recipes:
Honey Lavender Ice Cream - Kitchen Fervor
Lavender Chiffon Cake with Lime Curd - Technicolor Kitchen
Lavender Strawberry Shortcake - Vegalicious Recipes
Honey Lavendar Panna Cotta - Food Memoirs
Strawberry Lavender Lemonade - Andrea Meyers
Lavender Creme Brule - SippitySup

Margarita Cheesecake


Photo courtesy of B.J. LaCasse, Fine Texas Cuisine


The Lure


The Finished Product


From the kitchen of One Perfect Bite... They say third times a charm. There must be some truth to that, because it took me that long to get this cake right. I've made lots of cheesecakes over the years, but always keep coming back to my old favorite develop by Craig Claiborne for the New York Times. I thought for sure I'd found one to best it when I came across a recipe for a Margarita Cheesecake in Jon Bonnell's, Fine Texas Cuisine. While the directions were imprecise, I thought I could work my way through the omissions and still come up with a gorgeous cake. It didn't work that way. No pan size was given and I learned, to my chagrin, that a standard 9-inch springform pan wasn't large enough for the volume of batter the recipe produced. When the three hours it should have taken to bake the cake turned to four, I realized that that a convection oven was probably used to test the recipe. The biggest disappointment was the appearance of the cake. It bore no resemblance to the gorgeous photograph that lured me to the recipe in the first place. I realize that recipes used in restaurants don't always transpose to the home kitchen. This may have been one of those cases, but it is clear to me that the recipe was never tested in a home kitchen or these omissions would have been caught. The thing is, I didn't pay for the cookbook or three pounds of cream cheese to learn that this way. I groused a bit, actually I cussed a lot, but I was determined to make a Margarita Cheesecake. I did that by going back to ground zero. I added orange liqueur, tequila, lime juice and zest to Craig Claiborne's recipe and ended up with a fabulous cheesecake that's worthy of the fifth of May or Mother's Day. Here's the recipe that worked.

Margarita Cheesecake
...from the kitchen of One Perfect Bite, inspired by Craig Claiborne

Ingredients:
1⁄2 tbsp. butter, at room temperature
1 tablespoon finely grated lime zest
2-1/2 tablespoons fresh lime juice
2-1/2 tablespoons orange liqueur
2-1/2 tablespoons tequila
2 pounds cream cheese, room temperature
1 teaspoon vanilla extract
1-3⁄4 cups sugar
4 eggs
1/3 cup graham cracker crumbs

Directions:

1) Move oven rack to lowest position in oven and preheat oven to 350°. Grease a 3-inch deep 8" round one-piece cake pan all the way up to and including its rim with butter.
2) Combine lime zest, lime juice, orange liqueur and tequilla in a small bowl. Set aside.
3) Place cream cheese into bowl of a standing mixer and beat on medium high, scraping sides and bottom of bowl with a rubber spatula often, until completely smooth. Beat in vanilla and sugar well. Add eggs one at a time, beating well after each addition, but do not overbeat. Stir in juice and liqueur mixture lemon zest and juice with a spatula or spoon.
4) Generously spray buttered cake pan with nonstick spray, then pour in batter. Place cake pan inside a larger 3-inch deep pan. Place it in oven and pour hot water into larger pan, about 1-1/2-inches deep. Bake until top of cake is rich golden brown and feels dry when touched, about 1-1/2 to 1-1/2 hours (cake will be soft inside and become firm when cooled and refrigerated).
5) Lift cake pan out of water and place it on a cake rack. Let cake cool in pan for 3 hours. Cover pan with plastic wrap. Place a flat plate on top, invert, and remove pan. Sprinkle bottom of cake with graham cracker crumbs. Gently place another flat plate on top of crumbs. Very carefully invert again (without squashing cake), leave plastic wrap in place, and refrigerate cake overnight. Very carefully remove plastic wrap. Yield: 8 to 10 servings.

Cook's Note: This is a soft cheesecake and can be difficult to cleanly slice. I actually put the cake in the freezer for an hour before cutting to assure clean looking slices.

You might also enjoy these recipes:

Mini Black-Bottom Cheesecakes with Jam - The Food Addicts

Mocha Cheesecake - Evil Shenanigins
Mini Red Velvet Cheesescakes - Slashfoods