Strawberry Panna Cotta with Strawberry Compote


From the kitchen of One Perfect Bite...Mother's day is just a week away and I wanted to present a few dessert recipes for you to consider before the day is here. The first of the entries is figure friendly and designed for health and diet conscious eaters. It's a panna cotta, and when it's made with small field ripened strawberries, only the cook will know the dessert has been lightened. The key to the success of this dessert, however, lies in the flavor of the berries, and, to be honest, I wouldn't bother with it when local berries are less than prime. Even then, I enhance its flavor with a berry extract, that can be found at the sources listed at the end of the recipe. The recipe for the panna cotta first appeared in Gourmet magazine and can now be found on the Epicurious website. Comments associated with the recipe indicate that some readers had problems getting the panna cotta to stiffen enough for unmolding. To avert that problem, I've increased the amount of gelatin in my version of the recipe and recommend it be made a full 24 hours before you plan to serve it. While I make and serve the fruit compote that accompanies the recipe, I also like to use a bit of melted strawberry jam as a sauce for the panna cotta. This is not necessary, but it adds wonderful color to the finished dessert. This is really easy to make and I think those of you who try it will enjoy it. Here's the recipe.

Strawberry Panna Cotta...from the kitchen of One Perfect Bite inspired by Gourmet Magazine and Epicurious

Ingredients:

Panna Cotta
3 cups sliced strawberries (1 pound)
1-3/4 cups well-shaken low-fat buttermilk
1/2 teaspoon strawberry flavoring (optional)
Pinch of salt
1/2 cup granulated sugar
3 teaspoons unflavored gelatin
1/4 cup whole milk
1/4 cup heavy cream
Compote
2-1/2 cups strawberries (preferably small; 3/4 pound), trimmed
1/4 cup fresh orange juice
2 teaspoons superfine granulated sugar

Directions:
1) To make panna cotta: Blend strawberries, buttermilk, strawberry flavoring, salt and sugar in a blender until very smooth, then pour through a very fine sieve into a medium bowl, pressing hard on solids. Discard solids. Sprinkle gelatin over milk in a small bowl and let stand 1 minute to soften. Bring cream to a boil in a small saucepan. Remove from heat and add gelatin mixture, stirring until dissolved. Whisk gelatin-cream mixture into strawberry purée and pour into 6 (6-oz.) molds. Chill molds, covered, until firm, at least 24 hours. To unmold, dip molds in a small bowl of hot water 2 or 3 seconds, then invert panna cottas onto dessert plates and remove molds. Let stand at room temperature 20 minutes to soften slightly.
2) To make compote: While panna cottas stand at room temperature, halve strawberries lengthwise if small or quarter if larger. Whisk orange juice and superfine sugar together in a bowl until sugar dissolves. Add strawberries and toss to coat. Serve panna cottas with compote. Yield: 6 servings.

Source for strawberry extract can be found here.


One Year Ago Today: Spinach and Pancetta Strata


Two Years Ago Today: Coq au Vin


You might also enjoy these recipes:
Strawberry Rhubarb Compote - Gina's Skinny Recipes
Fresh Strawberry Pie - Sing for Your Supper
No Bake Strawberry Yogurt Cheesecake - Little Corner of Mine
Strawberry Shortcakes - The Flourishing Foodie
Strawberry Cake - Petit Foodie
Strawberry Cupcakes - Sugar Plum
Strawberry Swirl Cheesecake Bars - Sugar Crafter
Strawberry Linzer Cookies - Beach Lover Kitchen
Strawberry-Sour Cream Ice Cream - Confections of a Foodie Bride
Strawberry Sherbet - Shih's Cooking


A Summary of Entrees for Cinco De Mayo

I know that some of you will be preparing special meals for Cinco de Mayo. I thought this would be a good time to do a review some of the recipes we've featured for Mexican entrees. These are all great recipes and I hope you'll give one or two of them a try. Here are some of my favorites.


Orange Glazed Fiesta Chicken


Chicken Mole Poblano


Camarones a la Mexicana


Black Bean Burritos


Mexicali Pizza


Chicken Enchiladas Verde


Tortilla Soup


Pork Meatballs in Chipotle Sauce - Albondigas


Gratineed Chicken in Poblano Cream Sauce


Crock-Pot Pork Posole


Shrimp Enchiladas Verde

Smooshed Potatoes


From the kitchen of One Perfect Bite...If you are looking for a slightly different take on roasted potatoes, you might want to give this version a try. It differs from its more classic cousins in that the cooked potatoes are lightly smashed before being roasted. Younger members of our family refer to these as smooshed potatoes and that is a pretty apt name for them. It certainly is the only thing that sets them apart from other roast potatoes. The potatoes are smooshed to create a greater surface area for browning while they're in the oven. Having said that, I'm pretty much at a loss for words, other than to tell you that kids love to make these and they actually eat them. Because there is so little to the potatoes, I use my best olive oil for their roasting and finish them with fleur de sel - French sea salt. The one tip I want to share with you concerns the precooking of the potatoes. In order to avoid over cooking or water logged potatoes, I use my microwave to cook them. I place them in a single layer in a large microwave container to which 3 or 4 tablespoons of water has been added. I cover the dish and microwave the potatoes for 10 minutes at which point they are fork tender and ready to be smooshed for roasting. Recipes rarely get easier than this. Here's how the potatoes are made.

Smooshed Potatoes...from the kitchen of One Perfect Bite

Ingredients:
1-1/2 to 2 pounds unpeeled small Yukon Gold potatoes
olive oil
coarse salt
4 large unpeeled garlic cloves

Directions:
1) Preheat oven to 350 degrees F.
2) Pour 4 cups of water into a large pot and bring it to a boil. Add potatoes and 2 teaspoons salt and cook at a medium boil for 10 to 12 minutes, or until potatoes are cooked. Do not over cook. Alternatively, potatoes may be placed in a large microwave container to which 3 tablespoons of water have been added, and, cooked, covered, for 9 to 10 minutes on HIGH power until potatoes can be pierced with a fork.
3) When the potatoes are cooked, rinse them under cold running water to stop cooking. Place the potatoes on a work surface and, using your fist, punch them so that they flatten a bit. I protect my hand with a thin pot holder.
4) Place potatoes and the garlic cloves on a baking pan large enough to hold them in a single layer. Sprinkle with salt and drizzle each potato with olive oil. Transfer pan to oven and roast for 15 minutes. Turn potatoes to opposite side, drizzle with more olive oil and bake for 15 minutes longer. Transfer potatoes to a large serving dish. Peel and mash garlic cloves and add to potatoes. Mix well. Serve immediately. Yield: 4 to 6 servings.


One Year Ago Today: Fry Bread


Two Years Ago Today: Thai Cucumber Relish - Ah Jaht


You might also enjoy these recipes:
Cheesy Scalloped Potatoes - Girli Chef
Hasselback Potatoes - Home Cooking Rocks
Potatoes Au Gratin - Daily Chef
Buttery New Potatoes with Parsley - Drick's Rambling Cafe
Recipe: Potato Latkes - Christie's Cornor
Best Ever Potato Salad - Brown Eyed Baker
Chive and Onion Mashed Potatoes - Real Mom Kitchen
Roasted Radish and Potato Salad - Noble Pig
Cajun Fried Potato Cake - The Flourishing Foodie
Fried Smashed Potatoes with Lemon and Garlic - La Bella Vita

Rhubarb-Strawberry Jam


From the kitchen of One Perfect Bite...This is a spread that will not be to everyone's liking. It has a drab color and the predominant flavor of this sweet and tart jam is rhubarb. While I don't particularly like it on bagels or for breakfast toast, I think it makes a terrific quick appetizer when spread with cream cheese on freshly sliced baguettes. It also makes a wonderful sweet-tart glaze for sauteed or grilled chicken or pork. The recipe below requires canning equipment. While I sometimes make this spread for pantry storage, I usually bypass the water bath and simply refrigerate the jam in clean storage containers. I think those of you who like sweet-tart flavors will really enjoy this jam. If you like heat, I suggest you add a half teaspoon of red pepper flakes to the jam before storing it. If you fully process the jam, it will keep for a year on your pantry shelves. If you choose not to process it, the jam will keep for about a month in the refrigerator. I think those of you who appreciate spreads that are not to sweet will really enjoy this. Here's the recipe.

Rhubarb-Strawberry Jam...from the kitchen of One Perfect Bite courtesy of Sasha Chapman and Saveur magazine

Ingredients:
5 cups rhubarb (about 1-1⁄4 pounds), cut into 3⁄4 x 1⁄2-inch cubes
2 cups hulled and quartered strawberries (about 1⁄2 pound)
2 1⁄4 cups sugar
1 tablespoon fresh lemon juice

Directions:
1) Combine rhubarb, strawberries, sugar and lemon juice in a 4-quart saucepan set over medium heat. Bring to a boil and reduce heat to medium-low. Cook, stirring occasionally, until rhubarb breaks down and jam has thickened, about 1 hour. To determine whether jam has set, place a small spoonful on a chilled plate; if the dollop of jam holds firm and doesn't get runny around edges, it is ready for canning. If it runs, continue to cook for another 10 minutes.
2) Meanwhile, submerge three 1-cup canning jars, along with their lids and ring bands, in a large pot of boiling water and sterilize over high heat for 10 minutes. Transfer sterilized jars, lids, and bands to a clean dish towel. Fill each jar with hot jam, leaving at least 1⁄4" of space at the top. Wipe jar rims with a clean dish towel, place lids on jars, and secure ring bands.
3) Transfer filled jars to a canning rack; place rack in a pot of gently boiling water so that jars are submerged by at least 1"; let boil for 10 minutes. Transfer jars, set at least 1" apart, to a dish towel and let cool, undisturbed, for 24 hours. To test that jars have properly sealed, unscrew bands and lift each jar by the edge of the lid; if the lid holds, the jar is sealed. If it loosens, jar is not fully sealed, and jam should be refrigerated and used within 2 weeks. Sealed jars will keep, in a cool, dark place, for up to a year. Yield: 3 cups.


One Year Ago Today: Turnip Griddle Cakes


Two Years Ago Today: Asian-Style Beef Short Ribs for the Crock-Pot


You might also enjoy these recipes:
Rhubarb Upside-Down Cake - Kitchen Parade
Rhubarb and Plum Compote - Jaana's Kitchen
Strawberry and Rhubarb Crisp - One Perfect Bite
Rhubarb Streusel Cake - Angie's Recipes
Rhubarb Cornmeal Cake - The Red Spoon
Rhubarb Tarts - Almond Corner
Rhubarb and Yogurt Belgian Waffles - Sugar Crafters
Spiced Rhubarb Pancakes - 5 Star Foodie Culinary Adventures
Rhubarb Smoothie with Floral Notes - Dinners and Dreams
Rhubarb Fool - Alessandra Zecchini

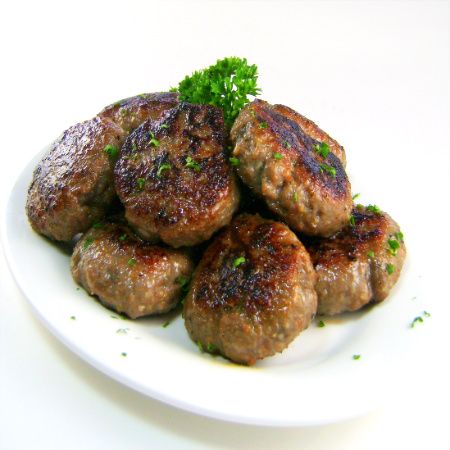
Lamb Sausage - Shepherds and Flocks for Hire


From the kitchen of One Perfect Bite...Bob and I were at the King winery this past weekend. We had gone to watch a marathon and sample a flight or two of some highly recommended wines. We weren't the only visitors. Sheep, an uncommon occurrence on the estate, were grazing in the orchards and the vineyards. The flocks had been rented to assist in "vegetation control". Goats, as in herds for hire, are not uncommon here. The state uses them to clear vegetation on slopes that are too steep for highway crews to safely work on. This was, however, the first time I'd seen sheep used to clear the land of others. It seems they are more discriminating in what they eat than goats, and there is less chance they will eat vines or damage trees. While watching the race, I struck up a conversation with the man standing next to me. I asked him what he did. He said he was a shepherd. Choking back a laugh, I was about to introduce myself as Mother Goose, but my better angels and long dead mother stopped me. Turns out, he was one of three people responsible for the flocks. He was the "lead shepherd". His words, not mine. A lot of lamb is raised in the areas surrounding the estate, so the same farms that supplied sheep for vineyard maintenance also provided a fresh supply of lamb for my freezer. I have several recipes that I've wanted to try and I though this would be a great time to test those for lamb sausage. I'll be featuring them over the course of the next two weeks. This recipe is based on one developed by Michael Symon. His recipe makes a delicious Middle Eastern-style sausage but it is very spicy and I'm not sure it would appeal to all of you. So, I've cut way back on the amount and source of the chilies used to season the lamb. I've also taken a few shortcuts that make the sausage easier to prepare. I hope you'll give the recipe a try. If you like lamb, I know you'll like this sausage. Here's the recipe.

Lamb Sausage... from the kitchen of One Perfect Bite adapted from Michael Symon, Live to Eat

Ingredients:
1/2 tablespoon extra virgin olive oil
1/4 cup finely minced shallot
2 large cloves garlic, finely minced
2 pounds ground lamb
2 teaspoons smoked sweet paprika (Pimenton)
1/2 to 1 teaspoon red pepper flakes
1 teaspoon ground cumin
1 teaspoon ancho chili powder
1 tablespoon kosher salt
1/2 teaspoon sugar

Directions:
1) Warm oil in a medium frying pan. When oil shimmers, saute shallots over medium heat until translucent , about 4 minutes. Add garlic and saute until fragrant. Remove from heat. Cool completely.
2) Combine onions, garlic, lamb, paprika, pepper flakes, cumin, chili powder, salt and sugar in a large bowl. Cover and chill from 2 to 24 hours. Form into patties or logs. Sausage may be refrigerated for up to a week. It may also be frozen. Fry over medium heat until patties reach an internal temperature of 150 degrees F. Yield: 12 patties.

As an afterthought, I thought some of you might enjoy reading about the sheep at the King Estate Winery. Here's a bit more information for you.

The Sheep Are Back

Sheep in the Vineyard


One Year Ago Today: Southwestern-Style Potatoes Roasted with Peppers and Herbs


Two Years Ago Today: Raspberry Yogurt Parfait


You might also enjoy these recipes:
Homemade Country Sausage - Look Whose Cookin'
Homemade Hot Italian Sausage - Grilling 24 x 7
Homemade Italian Sausage - Cooking with Michele
Homemade Breakfast Sausage - One Perfect Bite
How to Make Homemade Sausage - Simply Recipes
Making Andouille Sausage - New Orleans Cuisine
How to Make Sausage - Michael Ruhlman
How to Make Italian Sausage - Farmgirl Fare
How to Make Polish Kielbasa - About Eastern European Food
Smoked Beef Sausages - Menu in Progress

This is being linked to:
Outdoor Wednesday - A Southern Daydreamer

Top Tip #31 - Easy Envelope Box & Squares Challenge

Goooooood Morning Everyone!

WOWZERS - what an absolutely amazing number of entries we had into last weeks challenge - nearly 350 - AMAZING!!
Thank you so much to all that took part as well as those of you who left your tips. 

- - - - - - - - - - - - - - - - - - - - - - - -
OK for the weekly house keeping...

Thank you to all of you that are now leaving your fabulous tips on your blogs and
adding (TIP) next to your name when you link!!! GREAT JOB!
Please could you consider turning off Word Verification, It really does slow our commenting down and does not protect you from spam...

Comment Moderation is the best way, then you can delete silly spammers!
We all really appreciate those not using Word Verification
and would like to say thank you!!

Just as a reminder and for new crafters that may not know we have a 3 entry limit!
Thank you so much 


 - - - - - - - - - - - - - - - - - - - - - - - -


This weeks tutorial is a very easy Envelope Box

....so this weeks challenge is:

SQUARE CHALLENGE

Square cards / squares on your card - you name it, if it's a square, it can go in the challenge!

 - - - - - - - - - - - - - - - - - - - - - - - -
This weeks fabulous sponsors, who are giving away AMAZING prizes are:


Stash Books

celebrate handmade

who are offering our winner an amazing book:
Fanciful Felties from Mummysam


A bit about Stash Books: Stash Books is an imprint of C&T Publishing located in the San Francisco Bay Area.  If you’re craving beautiful authenticity in a time of mass-production…Stash Books is for you. Stash Books is a new line of how-to books celebrating fabric arts for a handmade lifestyle. Backed by C&T Publishing’s solid reputation for quality, Stash Books will inspire you with contemporary designs, clear and simple instructions, and engaging photography.

 - - - - - - - - - - - - - - - - - - - - - - - -

 This weeks featured tipper will win this wonderful prize collection from


Pizzazz Aplenty is run by Judy Bennet,
and she is offering our Featured Tipper this fabulous stack of goodies...


Judy's Bio:  Pizzazz Aplenty began with only a bit of bling and some ribbon, but over the past few months, we've added so much more. . . from cardstock to cellophane bags, as well as a variety of embellishments for your cardmaking or scrapbooking projects. , ,  stick pins, brads, buttons, cords, twines, laces, lots of ribbon, and over 20 choices of colors in our flatback pearls and rhinestones.   Our two newest additions to the inventory are The Best Glue Ever, and the Embellie Gellie - tools to make your crafting sooo much easier!  Please stop by and take a look at our store: Pizzazz Aplenty.  Remember, there's no such thing, as too much bling!  Judy Bennett.

 - - - - - - - - - - - - - - - - - - - - - - - -

Now onto the tutorial!


This week, it is my turn, Leanne, to do the tutorial.
I have chosen to do a very easy Envelope Box tutorial.

Some of the boxes I have come across are quite tricky to make...
So I made up my own one that is sooooooo easy!!!
I am no good working with teeny tiny measurements, so mine are all in inches and very easy to follow!
Apologies now for the pictures, but hey, my craft room is never tidy!

 ++++++++++
**  PLEASE CLICK ON PICTURES TO MAKE BIGGER  **

Make sure you get a large piece of card to use for the envelope box...this of course depends on the size of your card base.
The card that I am making this Envelope Box for measures 6.5in x 8.75in.
You need to score down 0.5in each side either side of your card measurement like this:

(the big space between the first 2 score lines is the size of your card)
Next turn your card around, and score at:

1.5in

2in

(the space between 2in and 8.25in
is the measurement the card)

8.25in


8.75in

(the space between 8.75in and 15in
is the measurement of the card)

15in


Now that you have scored your lines, turn the card around and cut / remove the following areas:


It should now look like this, make sure the two tabs in the middle are only cut up the sides so they can fold in.


Next fold over all the score lines and put tape on to seal like this:


 Stick it all together and it should look like this:


 You can finish it now by choosing your own closing and decorating it to match your card.
 I normally punch two holes and fasten it with a ribbon.
If you come up with a better idea I would love to hear it! 

Here is my Envelope Box with my finished card:


************************************************************* 

 Now onto some fabulous SQUARE inspiration from the DT


*************************************************************


THE RULES:
Don't forget to link Mr Linky to your post (not your blog) so we can find your project quickly.
Remember to write (TIP) next to your entry if you are also leaving us a tip on your blog.
(Tips left in the comments section will no longer qualify for the Top Tipper draw - we want everyone to see you have a tip on offer without having to go into the comments section) 

No 'back-linking' - any project posted to your blog before this morning and linked into this challenge will not be entered into the draw.

You must add a link back to TTT in your post.

Only 3 entries each.


Thanks

Challenge closes at 8pm UK time Monday 2nd May 2011
Now its over to you!


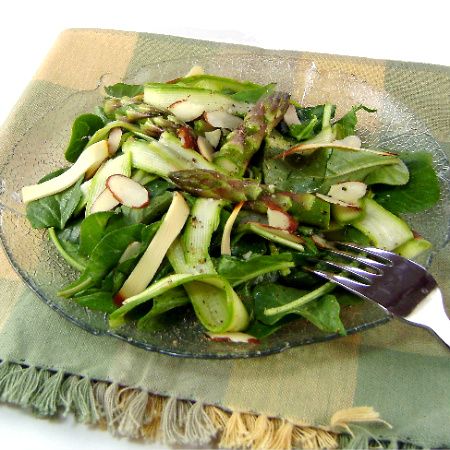
Shaved Asparagus Salad with Aged Gouda and Hazelnuts


From the kitchen of One Perfect Bite...How green is my valley? At this time of year, it looks like waves of velvet have washed it in shades of green that shimmer as it captures light. In another week, apple trees, now in flower, will drop their petals in a flurry that resembles falling snow and if you venture outside the city there are hectares of aching beauty just begging to be seen. Another green, asparagus, has begun its long climb toward the sun and in a week or two the season will be in full swing. While it is one of my favorite vegetables, I rarely prepare it when it's out of season. At this time of year, however, I make it several times a week. When the season ends, asparagus disappears from my kitchen. I do, however, collect recipes for it throughout the year. I suspect my one real talent in the kitchen is the ability to taste a recipe as it is read. Very few duds make it to my table. There are mistakes to be sure, but not a lot of them. I came across a recipe for a spring salad that was developed by John Ash for Fine Cooking magazine. I knew it would be a standout as I read through the recipe and, sure enough, it was. The salad consists of strips of shaved asparagus and cheese that are tossed with arugula and hazelnuts in a special vinaigrette. It was a perfect way to begin our Easter dinner. I hope you will try this. I know those of you who do will be delighted. Here's the recipe.

Shaved Asparagus Salad with Aged Gouda and Hazelnuts...from the kitchen of One Perfect Bite courtesy of John Ash and Fine Cooking magazine
Ingredients:
Vinaigrette
3 tablespoons seasoned rice vinegar
2 tablespoons fresh lemon juice
2 tablespoons extra-virgin olive oil
1 tablespoon fragrant honey, such as wild flower or orange blossom
1 tablespoon finely chopped shallots
Kosher salt and freshly ground black pepper to taste
Asparagus
3/4 lb. thick asparagus, trimmed
3 cups baby arugula
1/2 cup toasted, peeled, and chopped hazelnuts
2-1/2 oz. thinly shaved aged Gouda (use a vegetable peeler)

Directions:
1) To make vinaigrette: Whisk vinegar, lemon juice, olive oil, honey, shallots and salt and pepper together in a small bowl. Cover and refrigerate.
2) To make salad: Remove tips of asparagus and put them in a large bowl. Using a vegetable peeler, shave a stalk discarding first shaving. When shaving first side becomes awkward, turn stalk over and repeat. Add shavings to tips. Repeat with remaining stalks. Toss asparagus with 1/3 cup of vinaigrette and let sit for 10 to 15 minutes so that flavors meld and asparagus softens just a bit. Marinate for no more than 15 minutes because strips will lose their crispness as they sit. Add arugula and hazelnuts and toss, adding more dressing as necessary to lightly coat arugula. Arrange on plates and top with shaved cheese. Serve immediately. Yield: 4 to 6 servings.


One Year Ago Today: Goat Herder's Mac N' Cheese


Two Years Ago Today: Coffee Walnut Snack Cake


You might also enjoy these recipes:
Asian Noodle and Cabbage Salad - Karista's Kitchen
Jazzy Carrot Salad - Bless Us O Lord
Chickpea Salad with Tamarind Dressing - Lisa's Kitchen
Creamy Cucumber Salad with Fresh Dill - La Bella Vita
Un-Cobb Salad - Simply Recipes
Greek Salad - Pioneer Woman Cooks
Lemon Coleslaw - One Perfect Bite
Endive, Pear and Watecress Salad - One Perfect Bite
Scallion and Asparagus Salad - One Perfect Bite
Israeli Salad - One Perfect Bite