Hi Everyone, I don't know about you but where did the last 2 weeks go?
Your entries for the Birthday challenge were fantastic!
and its so lovely to have so many of you playing along.
and its so lovely to have so many of you playing along.
This week is my (Samantha) turn to set the challenge
and it's my first tutorial at Top Tip Tuesday! ekk!

Before I get to the challenge I have a little bit of house keeping to do...
Please be sure to read this as its about leaving your tips...
Please be sure to read this as its about leaving your tips...
Please leave your tip on your blog Then link your project as normal to to linky but add the word (Tip) after your name like this IE. Samantha (Tip)
We feel that people that visit your blogs are not seeing your tips
and that is a real shame as they are Fantastic! Also you will be helping us too as we have lots of your lovely people joining in now,
YAY!
we will be able to see your tips more easily too.YAY!
OK so then
The challenge I am setting you is
The challenge I am setting you is
"Show me those Buttons"
Use 3 or more buttons on your project!
There are a few tutorials but they are mostly based on altered buttons.
So an Optional Extra for you in you fancy it add to your blog posts.....
Alter your buttons and show us your before pictures too!
We have 3 AMAZING prizes this week from our awesome sponsors:
Prize 1


A bit about Stash Books: Stash Books is an imprint of C&T Publishing located in the San Francisco Bay Area. If you’re craving beautiful authenticity in a time of mass-production…Stash Books is for you. Stash Books is a new line of how-to books celebrating fabric arts for a handmade lifestyle. Backed by C&T Publishing’s solid reputation for quality, Stash Books will inspire you with contemporary designs, clear and simple instructions, and engaging photography.
Prize 2

Simon Says Stamp is offering a $20 gift voucher to spend in their store!!
In business since 2002, Simon Says Stamp is striving to offer you the best selection of Rubber Stamps, Altered Art, Scrapbooking, Artist Trading Cards, and Paper Crafting Supplies in the world. We stock over 100,000 items in our warehouses so that we can offer you quick service and one stop shopping at a great price!
Happy customers are the heart of our business.
We work hard to find and deliver to you the latest in stamping and paper crafting supplies! Attending classes, workshops, and sales meetings around the world, our goal is to keep our product offerings fresh and current. Make us your one stop easy shop - and we'll deliver right to your door!
Featured Tipper Prize


One pkg Brass Open Flower Charms
Judy's Bio: Pizzazz Aplenty began with only a bit of bling and some ribbon, but over the past few months, we've added so much more. . . from cardstock to cellophane bags, as well as a variety of embellishments for your cardmaking or scrapbooking projects. , , stick pins, brads, buttons, cords, twines, laces, lots of ribbon, and over 20 choices of colors in our flatback pearls and rhinestones. Our two newest additions to the inventory are The Best Glue Ever, and the Embellie Gellie - tools to make your crafting sooo much easier! Please stop by and take a look at our store: Pizzazz Aplenty. Remember, there's no such thing, as too much bling! Judy Bennett.
Get ya cuppa tea....I have been working on this post for a while so hope you enjoy it!
Button 1 tutorial

1. Pale yellow button and a colour box queue chalk ink set.
2. Ink button on a piece of paper.

3.Heat set ink - Redo steps 1, 2 & 3.
4.Perfect Medium ink.

5. Take the button on your tweezers and gentle press into ink.
6. Perfect Pearls and a soft brush.

7. Brush with Perfect pearls & heat set or leave to dry.
8. Add some button twine or ribbon add to your flower. (mine is handmade... will do a tut for that too another day :0)
Button 2 tutorial

1.Pale pink button and silver ink.
2.Press button into ink gently.

3. Ink edges
4. cover with clear embossing powder.
5. Shake of and heat emboss Redo steps 1,2,3,4 &5

6. No more pink... A nice shiny silver button.
Hand cut heart tutorial - for my card - see below...

1. Cut a circle either with a die, punch or scissor.
2. fold in half

3.Draw top part of heart using ½ way round a bottle.
4. Use a clear block or see through rules and draw straight line joining the top of heart.

5. Cut out heart.
6. Fold another piece of card in ½ and draw round the first heart this is your template.

7. Draw about 5mm in from edge of your first heart draw and cut out.
8. You should now have 2 heart templates.
NB: You can make the hearts what ever size you want just find something round to draw around.
Tutorial button 3 - Distressed button.

1. Ink clear button with white ink.
Heat set, repeat 1 & 2

3. Repeat 1 & 2 again.
4. With distress inks gently tap with ink tool - do not rub.

5. Ink edges.
6. Heat set and repeat 4,5 & 6

7. Short sharp spray with spray adhesive.
8. Add some glamour dust - Leave to dry (do not heat set)
No punch flower tutorial with Distress button centre.
This is using the hand cut heart tutorial from above.
This is using the hand cut heart tutorial from above.

1. Draw with a ball tool around your heart templates, that you made from the hand cut heart tutorial
you need 6 small & 6 large,
2. Cut them out.

3. Spray with a mist of water.
4. screw up hearts gentle.

5. Round in your palms, gently un roll and gently heat dry.
6. Distress hearts with your colour choice.

7. With a large glue dot lay down hearts to glue. in random pattern so petals over lap.
8. Crumple up your whole flower to get a grunge flower look.

9. Add a raiser foam to the centre.
10. Add glossy accents on top

11. Add your button, I added some button twine to my button.
12. Add your buttons and flower to your card.
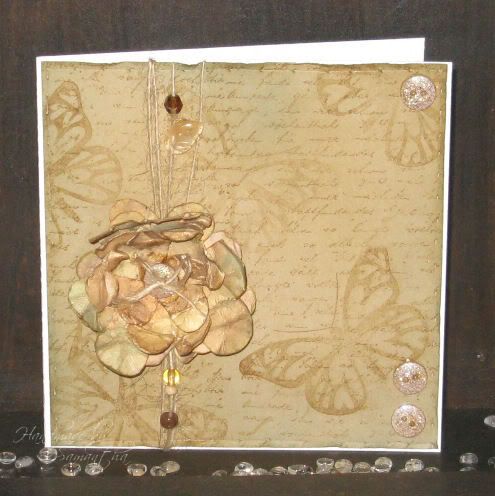
Here is my finished project,
I have added 3 more distressed buttons to the card.
I have added 3 more distressed buttons to the card.
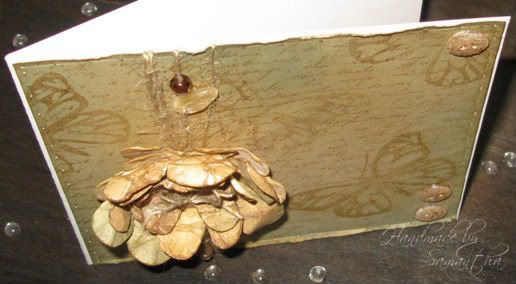
and another view so you can see the depth of the flower
Hope you have had fun with those tutorials
hugs Samantha :0)
And now for my teamies fantastic inspiration for you
and this week both teams are playing to so you get double inspiration too!
Heart buttons for Flower centres so pretty.


Great button closure & embellishments too.


Moriah
How clever is this? brilliant Idea....

Paula
Loving this shiny big button.

Vee
Love the different sizes.

Anne
Lots of lovely buttons here...

Eileen
Fantastic Brooch see Eileen's blog for how she made this!

Leanne
Love they way you stacked those buttons.

'Before & After' Button Photos
Before
(sorry for the awful pic - camera batteries ran out so had to use my phone!)

After
(got batteries for my camera now!)

Top Left - took off knitted covering
Top Right - Stamped, heat embossed, added GemsBottom Left - Nail Polish & Twinklets
Bottom Right (fabric covered) - Coloured with Promarker covered in Crakle Glaze!
What a difference a little bit of 'altering' makes!!!
*********************************************************************************
Please feel free to visit the Design teams blog and leave them some comments
they do really appreciate it.
So then its now over to you all we cant wait to see what you make!


